This tutorial shows the option to create a bright multi-layered snowflake. Simple models can be cut out of paper, even figures in 4 additions.
The main highlight of the shown snowflake is her multi-layeredness, brightness, and combination of different colors. Get to work boldly, in any case, you will definitely succeed in a beautiful and interesting piece of winter interior.
For work you need:
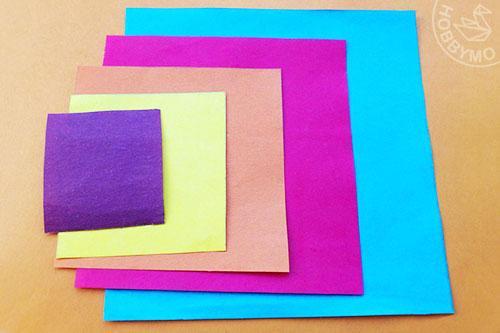
– squares of colored paper of different sizes and shades;
– scissors;
– ruler;
– pencil;
– glue;
– half bead is bright and iridescent.
How to make a layered paper snowflake
Cut out squares from sheets of colored paper, each of which will later become a layer of the future snowflake. Use a ruler (square) and a drawing pencil (pen) to draw 1 square on each sheet. But gradually reduce the size of the blanks, preferably proportionally. Also choose any number of shades to work with. The more, the more magnificent and elegant the craft will turn out. So, work has begun. You have decided on the colors, quantity and sizes. Now start modeling layers.
In order not to complicate your work, make simple models of snowflakes in 2 additions. Fold each square twice into four-layer triangles. In this position, you need to very clearly combine the corners and opposite sides, then iron the folds.

With a pencil, draw some suitable sketch, along these lines you will cut out the layers of paper. The easiest way is to set the shape of the bird.
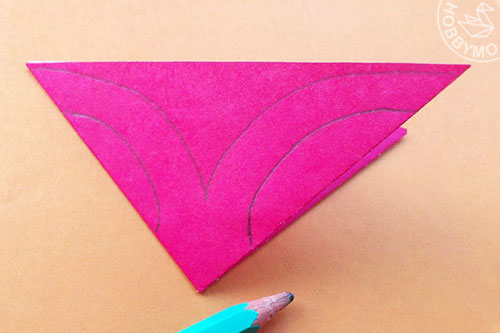
Cut out the figure. Before you, indeed, a bright model, which is very similar to a bird.

When you unfold the paper, you will see an amazing metamorphosis in front of you. The square has now turned into a small snowflake with four rays. But if it seems to you that such a model is boring, then that’s not all. The work must be continued because many more multi-colored sheets have been prepared.

Cut out similar parts from all prepared squares. Since the side of the square gradually decreased, the size of the four-pointed blanks will also decrease.

Start assembly with the largest part. Glue the second largest on top (only the center point can be lubricated with glue). Rotate the top layer perpendicular to the bottom one.

Next, assemble the layered model by gluing all the remaining squares according to size. Be sure to rotate each top layer relative to the bottom. It turned out to be a beautiful snowflake.
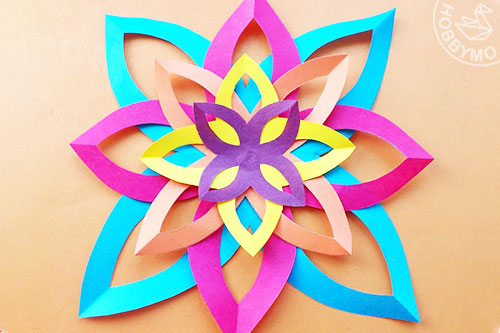
Add a small but important detail – a sparkling pebble in the center.
A bright snowflake made of colored paper is ready!

The author of the tutorial is Plasilinovaya, especially for HOBBYMO. Copying is prohibited, more details here.


