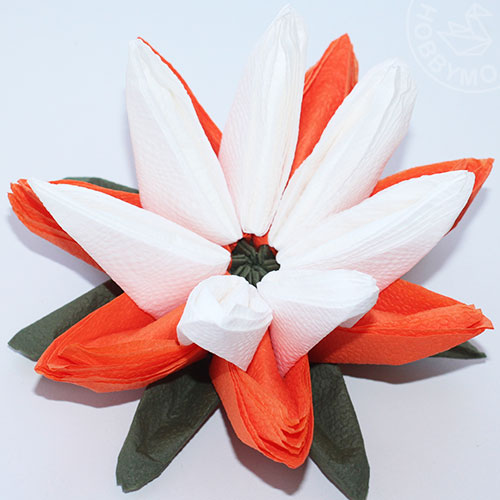
This beautiful flower can decorate any gift. If you make several lotus flowers and glue them onto cardboard, placing large green leaves nearby, you will get an excellent composition that you can give to your mother or grandmother.
Materials:
Take a square piece of paper. Do not use glossy paper, as it will crack at the folds. Regular cheap colored paper is best suited for this craft.

How to make an origami lotus, step by step tutorial
Step 1. If your paper is single-sided, then place the colored side up. Fold the sheet in half.

Step 2. Unfold, rotate the sheet 90° and fold in half again.

Step 3. Unfold the sheet, turn it over so that the colored side is on the bottom. Fold the corners towards the center.


Step 4. Without turning over to the other side, bend the resulting corners to the center again.

Step 5. Fold each movable triangle in half, first from one corner, and then, unfolding, from the other.
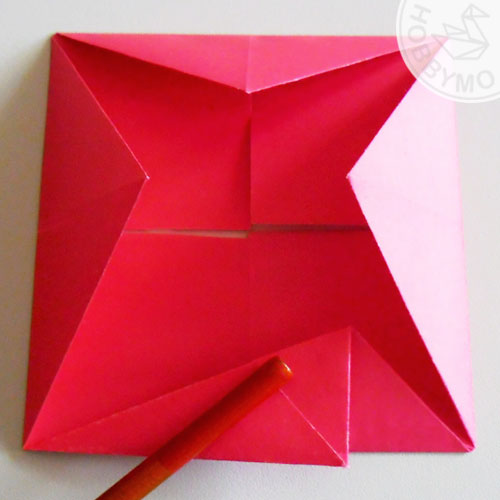

Step 6. You will have a square blank with these outlined lines.

Step 7. Now turn it over to the other side and bend all the corners towards the center.

Like this

Step 8. Turn the workpiece over again, bending the corners you just folded. You now have four more new folds in the middle. You will need them a little later, but for now, fold each movable triangle in the middle so that you can grab it with your fingers. Iron the small protruding triangles well so that they look up.

Step 9. Turn the workpiece over to the other side and bend the corners to the center along the folds so that the protruding triangles are at the edges of the workpiece.


Step 10. You should get a figure like this. To prevent it from opening, bend the middle inward and hold it with your fingers.

Step 11. Turn the craft over to the other side.

Step 12. Fold the edges of the paper outward from the center.

Step 13. Fold the piece in half, but do not iron the fold.

Step 14: Use your other hand to gently pull the corner. He will easily spread.

Step 15. Do the same with the opposite corner. To extend the other two corners, fold the craft again, but so that those corners fold in half. And repeat the steps. The back of the lotus should look like this.

Step 16. Turn the flower over to the front side and straighten all the petals.


Step 17. And then make the very edge of the corner of each petal sharp. These are the flowers you should get.

Author Zagainova_Alina, especially for HOBBYMO. Distribution of site content is prohibited, more details here.